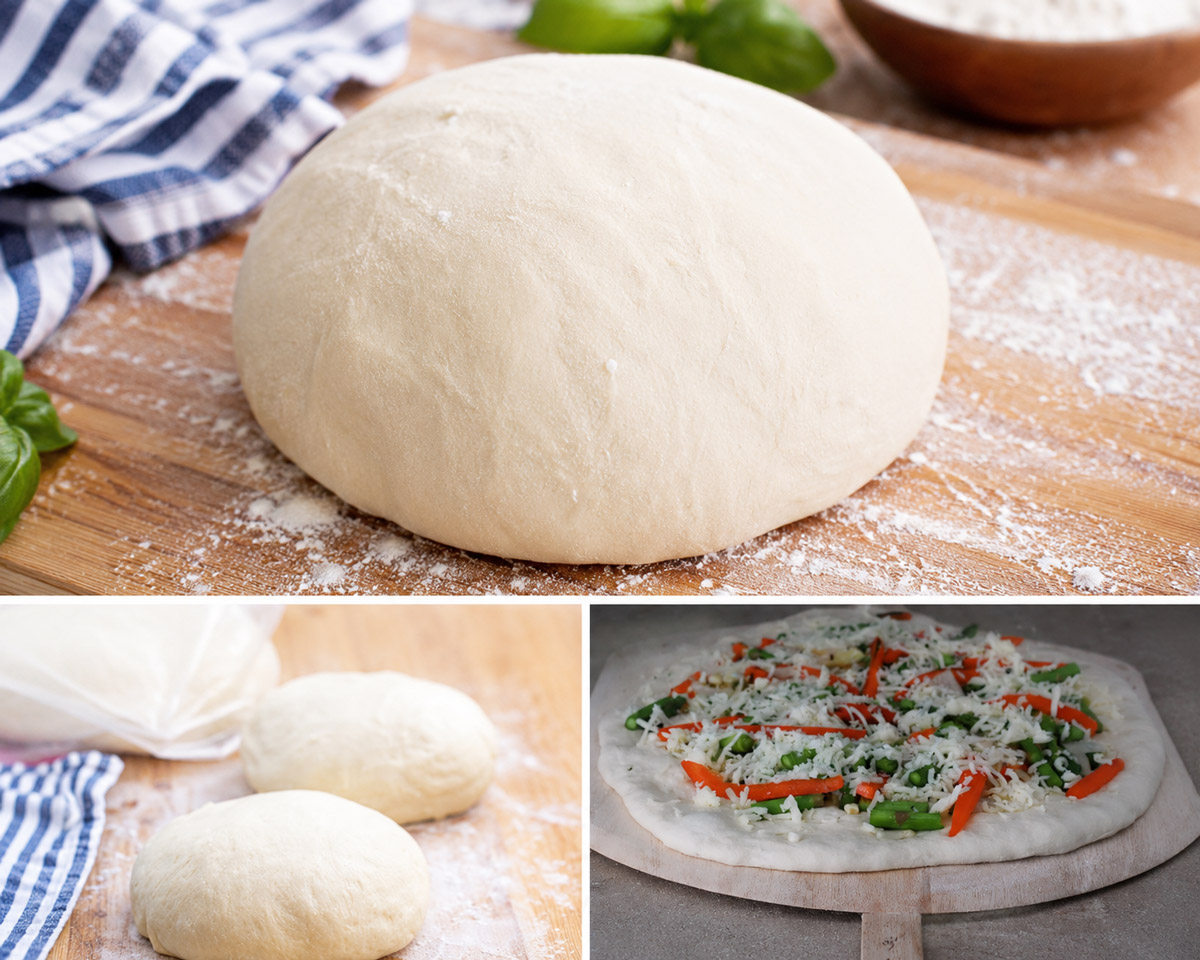
You do not need an expensive countertop appliance to craft pizzeria-quality crust at home. In fact, skipping the mechanical power of a stand mixer and making pizza dough by hand gives you direct, tactile control over the texture, hydration, and gluten structure of your dough.
When you mix and knead by hand, you learn to feel exact structural changes in the dough—shifting from a shaggy, wet mixture into a supple, elastic ball. This step-by-step guide walks you through crafting a world-class pizza crust with basic kitchen tools, simple ingredients, and straightforward hand-kneading techniques.
Why Hand-Kneaded Pizza Dough Tastes Better
Many home bakers assume a heavy-duty mixer is mandatory for serious bread or pizza making. While a machine offers speed, hand-mixing provides distinct advantages that improve your final crust:
- Superior Temperature Control: High-speed stand mixers generate friction, raising the internal temperature of your dough prematurely. Overheated dough causes yeast to ferment too quickly, leading to an off-flavor and uneven rise.
- Reduced Risk of Over-Kneading: It is nearly impossible to over-knead pizza dough by hand. You stay attuned to its elasticity and stop precisely when the gluten network matures.
- Minimal Equipment Required: All you need is a large bowl, a wooden spoon or spatula, a measuring scale or cups, and your counter space.
- Better Intuition: Feeling hydration levels directly helps you adjust flour or water on the fly, compensating for humidity changes in your kitchen.
Recipe Overview
- Prep Time: 15 minutes
- Hand-Kneading Time: 8 to 10 minutes
- Rise Time: 1 to 1.5 hours (or cold ferment for 24–72 hours)
- Yield: Two 12-inch pizza crusts (or 4 smaller personal pies)
- Skill Level: Easy / Beginner-Friendly
Ingredients & Functionality
To make exceptional pizza dough without a mixer, high-quality, measured ingredients are essential. Each component plays a specific role in texture and flavor development.
| Ingredient | Amount (US) | Amount (Metric) | Purpose & Selection Notes |
| Flour | 4 cups | 500 grams | Bread Flour (high protein, 12-14%) yields a chewy, bubbly crust with strong gluten. All-Purpose Flour works well for a tender, slightly softer crust. |
| Water | 1 ½ cups | 360 ml | Lukewarm (approx. 105°F / 40°C). Water dissolves salt and sugar while activating the yeast. |
| Yeast | 2 ¼ tsp | 7 grams (1 packet) | Instant yeast or active dry yeast. Instant yeast can be mixed directly; active dry requires blooming. |
| Salt | 1 ½ tsp | 9 grams | Kosher salt or fine sea salt. Tightens gluten structure and develops flavor profile. |
| Sugar or Honey | 1 tsp | 5 grams | Optional. Feeds the yeast initially and promotes golden-brown crust browning during baking. |
| Olive Oil | 2 tbsp | 28 ml | Extra virgin olive oil adds richness, tenderizes the crumb, and improves stretchability. Plus extra for coating. |
Step-by-Step Instructions
Follow these five steps to prepare your dough by hand from start to finish.
Step 1: Activate the Yeast (Blooming)
If using active dry yeast, measure out 1 ½ cups of lukewarm water (105°F / 40°C). Pour the water into a small bowl, stir in 1 teaspoon of sugar until dissolved, and sprinkle 2 ¼ teaspoons of yeast across the surface.
Let the mixture rest undisturbed for 5 to 10 minutes. A thick, foamy layer will form on top, confirming the yeast is active and alive.
Note: If you are using instant yeast, skip this blooming stage. You can mix instant yeast directly with the dry ingredients in Step 2.
Step 2: Mix the Dry & Wet Ingredients
In a spacious mixing bowl, whisk together your flour and salt until evenly distributed.
- Create a shallow well in the center of the flour mixture.
- Pour the activated yeast liquid and 2 tablespoons of extra virgin olive oil directly into the well.
- Using a sturdy wooden spoon or rubber spatula, stir in circular motions from the center outward, gradually drawing the dry flour into the wet mixture.
- Continue stirring until a sticky, shaggy dough mass begins to pull away from the sides of the bowl and no pockets of dry flour remain.
Step 3: Knead the Dough by Hand
Hand-kneading develops the gluten proteins (gliadin and glutenin) into a strong matrix that traps gas during fermentation, creating air pockets and structural strength.
- Prepare the Surface: Clean your countertop thoroughly. Dust it lightly with a tablespoon of flour. Scrape your shaggy dough out of the bowl onto the surface.
- Master the Push-and-Fold Motion:
- Press down and forward into the center of the dough using the heels of both hands, pushing it away from your body.
- Fold the top edge of the stretched dough back over itself toward you.
- Rotate the entire piece of dough 90 degrees clockwise.
- Establish a Rhythm: Repeat this push, fold, rotate process rhythmically.
- Knead for 8 to 10 Minutes: Initially, the dough will look rough and feel sticky. As you continue, it turns cohesive, smooth, and supple.
- Test for Readiness: Perform the “poke test.” Press a clean finger firming into the surface of the dough. If it springs back promptly, your gluten network is fully formed. If the indentation remains, continue kneading for another 2 minutes.
Step 4: The First Fermentation (Rise)
- Shape your kneaded dough into a tight, uniform ball by tucking the edges underneath.
- Drizzle 1 teaspoon of olive oil into your mixing bowl and spread it evenly. Place the dough ball inside, turning it over once so the surface is lightly coated in oil (this prevents a dry skin from forming).
- Cover the bowl tightly with plastic wrap or a clean, damp kitchen towel to retain moisture.
- Set the bowl in a draft-free, warm spot (75°F–80°F / 24°C–27°C) for 60 to 90 minutes, or until the dough has roughly doubled in total volume.
Step 5: Portion and Relax the Gluten
- Once fully risen, gently press your fist into the center of the dough to deflate large gas pockets.
- Transfer the dough back onto a lightly floured work surface.
- Use a bench scraper or sharp knife to divide the dough into two equal portions (about 430 grams each).
- Roll each half into a round, taut ball on the counter using your cupped hands.
- Cover the dough balls with a damp towel and let them rest at room temperature for 15 minutes. This crucial resting phase relaxes the gluten coils, allowing you to stretch the crust easily without it snapping back.
Pro Tips for Pizzeria-Quality Results
To elevate your hand-kneaded crust from good to professional grade, keep these key technical tips in mind:
1. Ditch the Rolling Pin
Never use a rolling pin on fermented pizza dough. A rolling pin flattens and crushes the delicate carbon dioxide bubbles built during the rise. Instead, stretch the dough using your fingers and the backs of your knuckles, working gently from the center outward to create a puffy rim (cornicione).
2. Handle Sticky Dough Correctly
If your dough feels too sticky during hand-kneading, avoid adding excessive flour. Dumping heavy amounts of raw flour on your board dries out the recipe and results in a dense, tough crust. Instead, coat your hands lightly with olive oil or damp them with water to prevent sticking while keeping hydration levels balanced.
3. Harness the Cold Ferment Method
For complex flavor and an airy crust structure, practice cold fermentation. After mixing and initial shaping into dough balls, place them in airtight containers and refrigerate them for 24 to 72 hours. Cold temperatures slow yeast activity while allowing enzymes to break down starches into simple sugars, deepening the crust’s natural flavor.
Frequently Asked Questions
Can I use all-purpose flour instead of bread flour?
Yes. All-purpose flour yields a delicious, slightly softer crust with a tender bite. Bread flour has higher protein content (12–14% vs. 10–12%), which produces more gluten strength, a chewier texture, and larger air bubbles in the rim.
Why is my pizza dough springing back when I try to stretch it?
Spring-back happens when the gluten network is overly tense. If the dough snaps back aggressively as you stretch, stop handling it, cover it with a towel, and let it rest on the counter for 10 to 15 minutes. Once the gluten relaxes, it stretches smoothly without tearing.
How do I store leftover dough?
You can store formed dough balls in sealed, oiled containers in the refrigerator for up to 3 days. For longer storage, wrap individual dough balls tightly in plastic wrap and freeze them inside a freezer bag for up to 3 months. Thaw frozen dough overnight in the refrigerator before using, then bring to room temperature 1 hour before stretching.