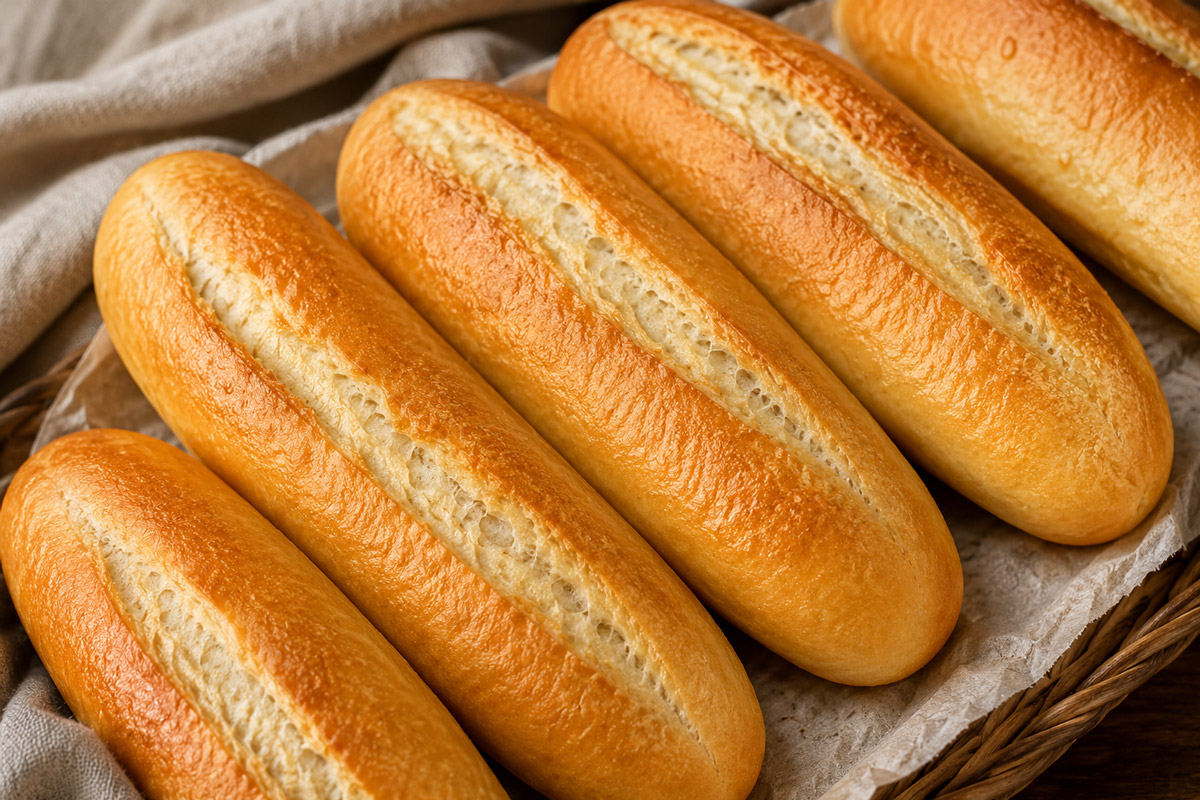
There is a distinct disappointment that comes from buying sub rolls at a local grocery store. Most commercial rolls are either spongy, airy, and prone to collapsing under cold cuts, or they feature a hard, leathery crust that scrapes the roof of your mouth. When building an authentic Italian hoagie, hero, or grinder, the bread is not just a vehicle for the fillings. It is the foundation of the entire sandwich experience.
A true bakery-style Italian sub roll offers a delicate balance of textures. It features a thin, golden exterior that crackles under your teeth, paired with a soft, pillowy, yet structurally sound interior that absorbs seasoned oils and vinegars without turning into soggy paste. Achieving this professional quality in a home kitchen does not require commercial bakery deck ovens or obscure ingredients. With a clear understanding of flour mechanics, proper shaping techniques, and effective oven steaming, you can bake authentic sub rolls right at home.
Below, you will find the complete guide and tested homemade Italian sub rolls recipe, including the science behind a crisp crust and step-by-step instructions for guaranteed baking success.
The Four Secrets to Perfect Sub Rolls at Home
Before tying on your apron, understanding the core baking principles that separate dense, flat bread from airy, artisan-grade rolls is essential.
1. High-Gluten Bread Flour
While all-purpose flour works in a pinch, bread flour is non-negotiable if you want an authentic bakery chew. Bread flour contains a higher percentage of protein (around 12% to 14%), which creates a robust gluten matrix. This strength allows the dough to hold its shape during its final rise and retains the gas bubbles generated by the yeast, giving you an open, airy crumb that can support weight without squishing flat.
2. Oven Steam for Crackly Crusts
That signature shatter-crisp crust found on artisan bakery bread comes directly from humidity. Moisture during the first 5 to 10 minutes of baking keeps the exterior dough soft, allowing the roll to expand fully before the crust sets (a process known as oven spring). Simultaneously, steam gelatinizes the starches on the surface, which dry out later in the bake into a paper-thin, delicate, crunchy crust.
3. Tight Surface Tension During Shaping
Simply rolling dough into a log is not enough. Proper shaping creates surface tension along the outer skin of the dough roll. This tension forces the bread to rise upward in the oven rather than spreading sideways into a flat, wide pancake shape.
4. Controlled Enrichment
Pure artisan hearth breads use only flour, water, yeast, and salt. However, sub rolls require a touch of fat and sweetener. Adding vegetable or olive oil keeps the interior crumb soft, tender, and moist for days, while sugar feeds the yeast and aids in uniform golden browning.
Recipe Overview & Timings
| Key Metric | Details |
| Prep Time | 20 minutes |
| Rise Time | 1 hour 45 minutes |
| Bake Time | 15 to 19 minutes |
| Total Time | ~2 hours 25 minutes |
| Yield | 8 soft, sturdy sub rolls (approx. 7–8 inches each) |
Ingredient List
To yield the best results, measure your ingredients accurately. Using a digital kitchen scale is always recommended for flour measurement, though standard volume measurements are provided below.
- 1 ¼ cups warm water (105°F to 110°F): Warm water activates the yeast without killing the living organism.
- 2 ½ teaspoons instant yeast (or 1 standard packet): Instant yeast can be mixed directly with dry ingredients or hydrated in water.
- 3 tablespoons granulated sugar: Feeds the yeast and softens the dough crumb.
- ¼ cup vegetable oil or extra virgin olive oil: Vegetable oil yields a neutral flavor and tender bite, while olive oil adds a subtle fruity note.
- 3 ½ cups bread flour (approx. 420g): High-protein flour gives the rolls structure and chew.
- 1 ½ teaspoons fine sea salt: Enhances flavor and regulates yeast fermenting speed.
- Yellow cornmeal: For dusting the baking sheet to prevent sticking and add a traditional pizzeria bottom texture.
- 2 tablespoons melted butter: For brushing onto the rolls before baking to promote rich browning.
Step-by-Step Instructions
Step 1: Knead the Dough
In the bowl of a stand mixer fitted with a dough hook attachment, combine the warm water, instant yeast, granulated sugar, oil, bread flour, and fine sea salt. Turn the mixer to low speed for 2 minutes to bring the liquid and dry ingredients into a cohesive, shaggy dough.
Once no dry flour remains, increase the mixer speed to medium. Knead for 8 to 10 minutes. The dough is ready when it clears the sides of the bowl, feels smooth and elastic, and is slightly tacky to the touch without sticking heavily to your fingers. If the dough remains excessively sticky after 6 minutes, add 1 tablespoon of extra bread flour at a time.
Step 2: The First Rise
Lightly coat a large bowl with neutral oil or cooking spray. Transfer the kneaded dough into the bowl and turn it once so the top is lightly greased. Cover the bowl securely with a damp kitchen towel or plastic wrap. Place the bowl in a warm, draft-free spot for approximately 1 hour, or until the dough doubles in size.
Step 3: Divide and Rest
Gently press down on the center of the risen dough to release excess gas. Turn the dough out onto a clean, unfloured work surface. Using a bench scraper or sharp chef knife, divide the dough evenly into 8 equal pieces (roughly 100g to 105g each).
Shape each piece into a rough, oval log. Cover the dough pieces loosely with a sheet of plastic wrap and allow them to rest for 10 minutes. This short bench rest relaxes the tight gluten strands, making the rolls easier to shape without snapping back.
Step 4: Shape the Sub Rolls
Line a large, heavy-duty baking sheet with parchment paper and sprinkle it evenly with yellow cornmeal.
Take one portion of dough and flatten it on your counter into a rectangular shape (roughly 4 inches by 6 inches). Working from the long edge, roll the dough up tightly into a cylinder, pulling back slightly as you roll to build firm surface tension.
Once completely rolled, firmly pinch the long seam together along the entire length using your thumb and forefinger. Pinch both end tips to seal them neatly into rounded ends. Place the roll seam-side down onto the prepared baking sheet. Repeat with the remaining dough pieces, leaving at least 3 inches of space between each roll to allow for expansion.
Step 5: The Second Rise
Gently brush the top and sides of each shaped roll with melted butter. Cover the pan loosely with lightly greased plastic wrap to prevent the dough skin from drying out. Let the rolls rise in a warm place for 45 minutes, or until they look noticeably puffy, soft, and nearly doubled in volume.
Step 6: Bake with Steam
While the rolls are completing their second rise, preheat your oven to 425°F (218°C). Place an empty, rimmed metal baking pan or heavy cast iron skillet on the bottom rack of the oven.
Just before placing the bread in the oven, use a sharp razor blade, lame, or serrated knife to score a swift 1/4-inch deep longitudinal cut down the center of each puffy roll.
Carefully open the preheated oven and pour 1 cup of boiling water directly into the empty bottom pan. It will instantly generate a cloud of heavy steam. Immediately place the sheet pan with your rolls on the middle oven rack and close the oven door quickly to trap the steam.
Bake at 425°F for 15 to 19 minutes, until the rolls are deep golden brown and sound hollow when tapped on the bottom.
Step 7: Cool
Remove the sub rolls from the oven and transfer them immediately to a wire cooling rack. Allow the rolls to cool completely for at least 20 to 30 minutes before slicing open. Slicing warm bread causes internal steam to escape rapidly, which can turn the delicate interior gummy.
Flavor Variations and Custom Crusts
Once you master this base homemade Italian sub rolls recipe, you can customize the exterior crust to match your favorite sub shop style:
- Italian Herb & Cheese Style: Just prior to baking, spray the puffy dough lightly with water mist. Generously sprinkle the tops with dried oregano, garlic powder, shredded sharp cheddar, and grated parmesan cheese.
- Classic Seeded Crust: Brush the rolls with a light egg wash (1 egg beaten with 1 tablespoon of water) instead of butter, then sprinkle generously with unhulled sesame seeds or poppy seeds before placing them in the oven.
- Garlic Herb Crust: Add 1 teaspoon of dried basil, 1 teaspoon of dried oregano, and 1/2 teaspoon of garlic powder directly into the dry flour mixture during Step 1.
How to Build the Ultimate Italian Sub
Having a freshly baked roll is half the battle. To assemble a deli-style sandwich that rivals cold-cut specialists, layer your ingredients strategically:
- The Foundation Slice: Cut the roll open horizontally using a offset serrated bread knife, leaving the back hinge intact so fillings stay contained.
- Cheese Barrier: Place slices of provolone or fresh mozzarella along the bottom bread layer. The cheese acts as a barrier, preventing vinegar and tomatoes from soaking into the bottom crust.
- Cured Meat Layering: Fold (do not lay flat) high-quality Italian meats in ribbons to create airy volume. Layer hot capicola, salami, mortadella, and prosciutto.
- Fresh Toppings: Add thinly sliced red onions, ripe tomatoes, and shredded iceberg lettuce.
- Deli Vinaigrette: Whisk together extra virgin olive oil, red wine vinegar, dried oregano, salt, black pepper, and a pinch of red pepper flakes. Drizzle generously over the lettuce right before serving.
Storage and Reheating Guidelines
- At Room Temperature: Store fully cooled rolls in an airtight plastic bag for up to 3 days.
- Freezing: Wrap individual rolls tightly in aluminum foil and store them inside a heavy-duty freezer bag for up to 3 months. Thaw at room temperature for 1 hour before using.
- Reviving the Crisp Crust: To restore that fresh-out-of-the-oven crunch to stored rolls, mist the outer crust lightly with water and heat them in a preheated 375°F oven for 5 minutes.
Frequently Asked Questions
Can I make this dough without a stand mixer?
Yes. Mix the ingredients in a large bowl with a wooden spoon until a shaggy mass forms. Turn the dough out onto a lightly floured surface and knead by hand for 10 to 12 minutes until smooth and elastic.
Why are my sub rolls flat instead of round and tall?
Flat rolls are usually caused by over-proofing during the second rise or failing to roll the dough tightly enough during shaping. Ensure you create tight surface tension when rolling the cylinder and bake the dough as soon as it looks puffy and soft.
Can I use all-purpose flour instead of bread flour?
You can use all-purpose flour in equal measure, but the resulting texture will be softer and slightly cake-like rather than delightfully chewy. If using all-purpose flour, reduce the water quantity by 1 to 2 tablespoons to avoid an overly wet dough.